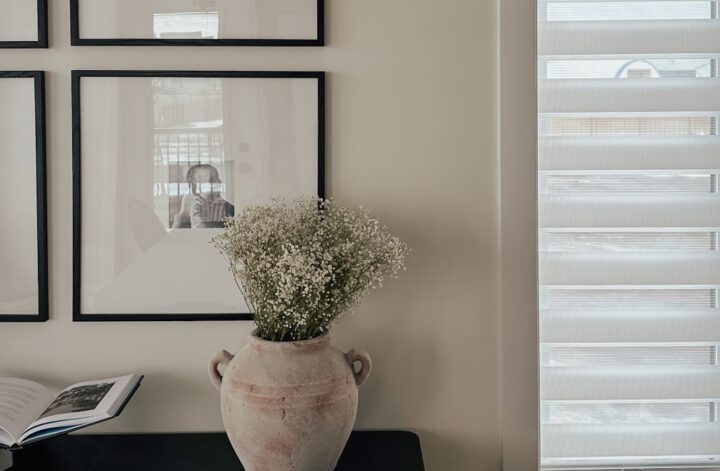
The way this DIY was so satisfying to complete! My square frames (linked here) have been leaning against the wall in the dining room for weeks waiting for me to finish this up! When I ordered these frames, I knew I wanted to put them up in a large grid gallery wall (I love a good gallery wall). I was always wanting to have prints matted to a small square, in black and white. I literally couldn’t find any photo frame mats in the sizing I wanted (or anything really that was somewhat affordable).
I figured they wouldn’t be that hard to DIY, and I was right! In total, making 4 of these custom mats took about 15 minutes and they turned out amazing. Even better is they are so easy to customize whichever size you would like for almost any photo frame size (almost, but not all).

You only need to pick up one thing to make these
A quick stop at the Dollar Store (or Staples, anywhere with paper products) to pick up a few sheets of the white poster board (I used one sheet per frame).
The photos that I printed off were 6×6 so I made photo openings just a touch smaller than that.
You can see there are two sides to the poster board; one is shiny and one is matte. You want the matte side to be facing out as the ‘photo mat’ side. The shiny side will be facing the back of the frame. It looks more luxe and realistic that way.

To make the square, I found the middle of the board, then measured out evenly on each side to make a square in the size I wanted. I used my Cricut supplies to get a sharp, crisp edge and popped the mat back into my frame. A rotary cutter is the best for this! To secure the print I used a little tape on the back.

All the tracing is done on the shiny side, I was cutting on that side too so the matte side wouldn’t get scuffed or have any pencil marks.

To make the remaining three photo mats, I used the first one and traced the inside square onto the shiny side of the other photo mats and then cut them out.
I popped everything back into the frame (these are the ones that I bought). Then I hung them back up on the wall. It’s an odd angle to take a photo from because we don’t have our dining room furniture in yet (waiting on a table still) so it’s a bit of a hot mess lol. I try to leave that out of photos when I can ◡̈

For the prints, I found some candids and random ones I took of the kids on my phone, edited them in Lightroom with a black and white preset, then printed them out online.
Unless I told you I made these photo mats, I don’t think you would ever know, they look so good! This project only cost $4, which is insane because I had to buy some custom photo mats for the larger 19×27″ frames in my living room and those were $25 each! (I would have DIY’d those too if I was able to find poster board large enough.)
Here is how it all came together
Eventually I will be putting up some linen curtains to frame the windows in here. I added a picture light above the frames, and at some point I’ll move this console to the bedroom and find one that has storage for the dining room. I have a mood board I’ve been working on that I will share soon! Just finishing some details on it!


I shared this on my Instagram @theblushhome – but feel free to save this easy tutorial too! I have a pin-friendly pic below!
Sources:
Console table – Sundays Company (similar here)
Lamp – Urban Barn (similar here)
Wood Frames – here
Distressed Urn Vase – HomeSense (similar here)
Picture Light – here
Book Holder – here
If you do share on social media, make sure to tag me so I can see how they turned out! Have a great day 🙂
xx Megan

More easy DIYs!
DIY Minimalist Dollar Store Planter
Entryway Tour + My DIY Built In Closet Bench


1 Comment
This is brilliant! I framed a sketch my neighbour did of my dog years ago silimalr to this, and still love it. I haven’t been able to find mats like it since. I have some artwork that seems to get lost in smaller frames but I just couldn’t get the right matting. Thank you, I can finally get these peices up and make them stand out!