
** I built this DIY bench and completed the foyer makeover late 2019, before any Covid-19 restrictions were in place. We would not and have not ventured out to stores during this crisis so please take that into account and stay home if you can 🙂
Hi Friends! I’m sharing our entryway tour today and how I created this cozy space with a built-in bench in our closet! I’m really happy with this little project and it’s wild to me how a little paint and shuffling of furniture can totally transform a room. I was fortunate enough to have the opportunity to work with The Home Depot on this project and I found everything I needed there!

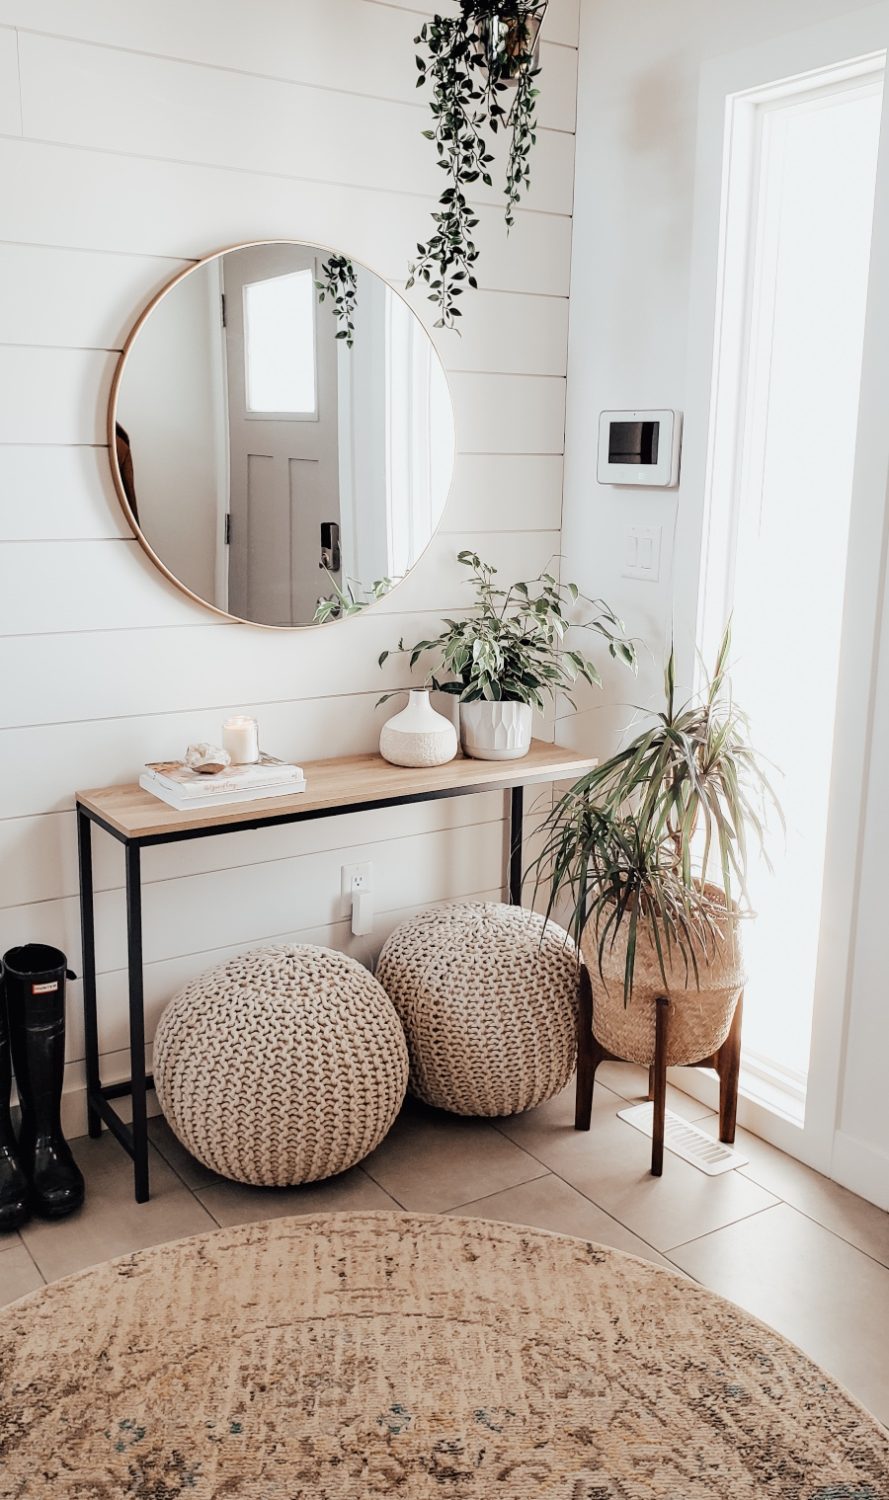
The first thing I did was sell the large bench we had in our foyer.
We had moved this over from our last home, so it was fine for the time being but both Kiel and I didn’t love it here. Removing it made our entryway feel 100x more open.
 ^^ the bench was on the left side underneath the mirror
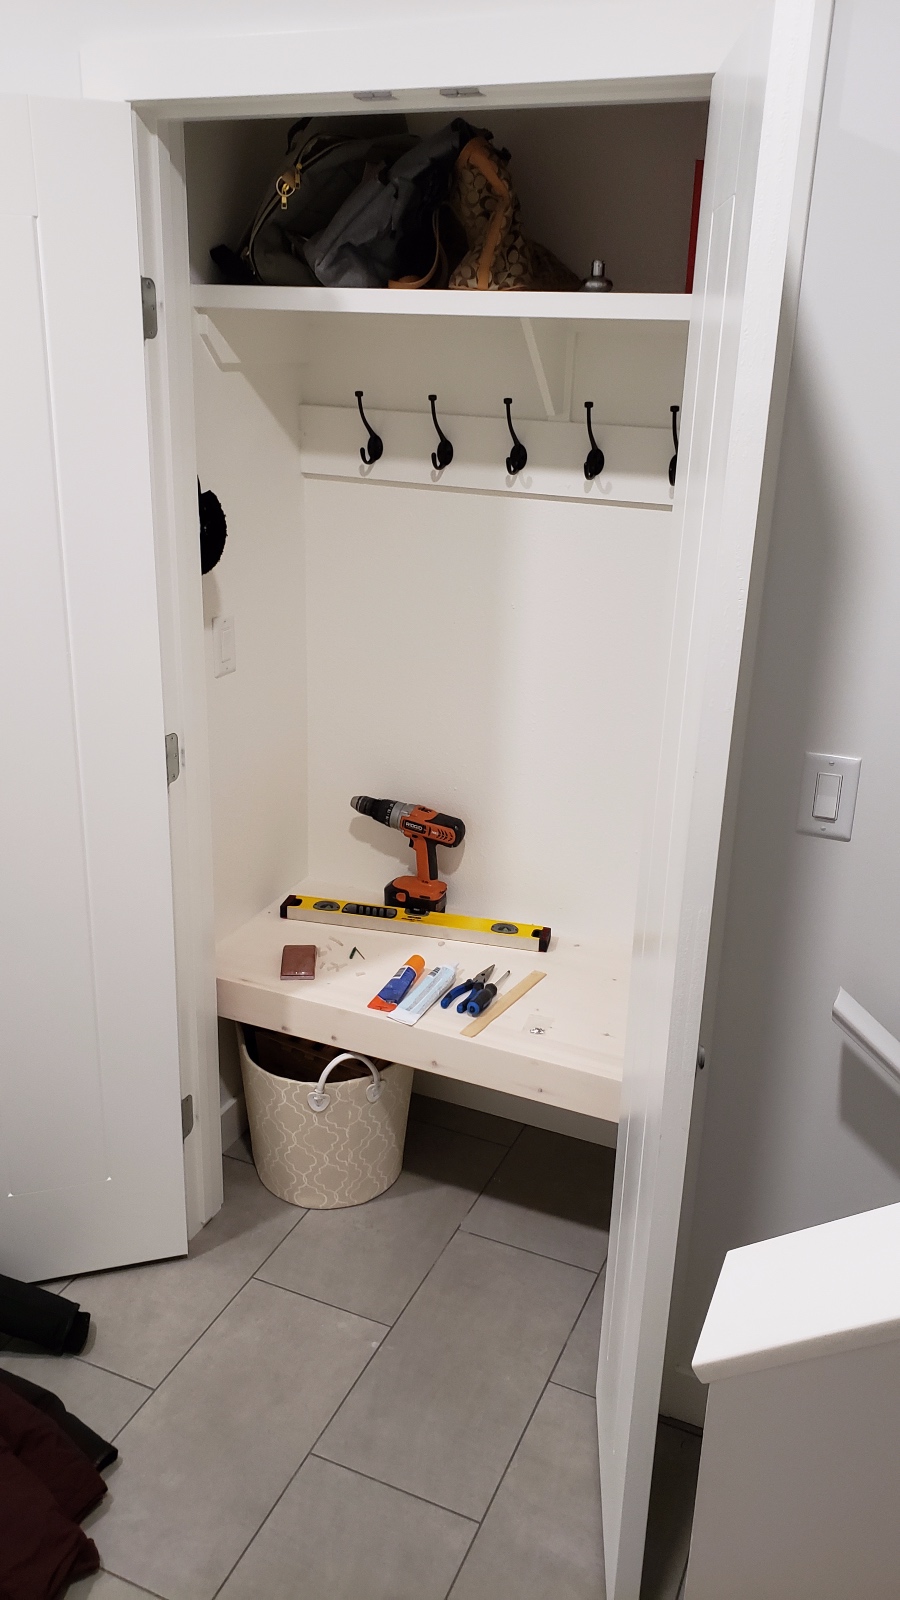
Then I cleared out the closet. I wish I took a proper before photo! Basically, there was a cheap plastic rolling organizer that didn’t hold much, a basket full of out of season shoes and then all the jackets we owned in the world stuffed in here lol. So I cleared it out and anything that was out of season was packed away, and things that didn’t belong there were put away too.

For the bench I used 2 x 2’s (for the frame), 1 x 3 (for the finishing trim) and a high quality pine board for the bench seat.
Now, on to building the bench!
I measured how high up I wanted my bench to be, I went with 22 inches. Then I measured all four sides. The walls in this house, despite it being a brand new home, aren’t even whatsoever lol. It’s so odd! I found this when I was building our floating shelves beside our fireplace. So I measured all four walls (twice lol). Instead of building the support inside the closet and securing it to wall as the first step, I built the frame first. I only did this because of where the studs were located in our closet. It’s not a big closet and it was easier to build the frame first and secure it to the studs in the closet after… I’ll show you what I mean – keep reading 😉
After cutting the 2 x 2’s to size, I made this frame…

The middle piece is the support beam for the bench. Then I added the last two boards to the frame.

Tip ** Make sure to pre-drill pilot holes to prevent splitting the wood. Especially with a soft wood like pine.
Then we popped it into the closet to make sure it fit.
Next up was the bench top. I used a high quality pine board from The Home Depot. It was measured and cut to size. Then again, we popped it into the closet to make sure it fit before it was secured to the frame. I’m a big ‘measure twice cut once’ person lol.
The bench seat was cut to size and I laid the frame on top of it and pre drilled the pilot holes. Then screwed them together.


The top was secured from the bottom of the frame, this way the screws will be hidden from the bench.
Then the whole bench received a really good sanding!
The studs were marked off before securing the bench inside the closet. Drilling into the studs is so important here too! Since we only had one stud along the back and one on the left side of the closet (seriously, that’s all!). I secured the bench in two places along the back stud (two screws vertically into the stud), plus I did a corner screw to secure the bench to the studs that would be in each corner of the closet, plus the one side stud as well.
Once the bench was in (already loving it so much!) I measured and cut the wood that would be the front lip. I sunk the screws so that I would be able to fill in the holes with wood filler.

To finish off the bench, I applied a wood conditioner, then two coats of white wash stain.

I LOVE IT!
I also removed the closet rod, filled those holes and then cut a piece of wood to fit the back wall. I sanded it really well and applied to coats of our closet wall paint. The board was then screwed into the studs and I added all the hooks (these ones here).
I caulked all the seams as well. This instantly makes everything look so professional – it’s one of my favourite parts of DIY’ing!
The rest of this space had a little makeover too…
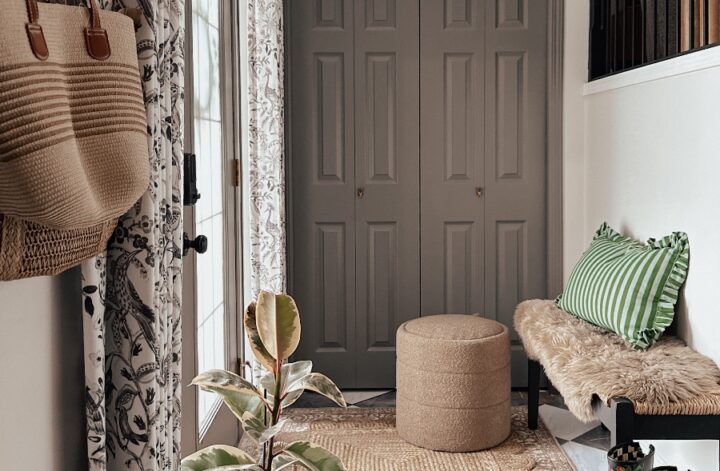
I painted our front door Dorian Grey. Painting your front door makes a big impact guys! It’s so inexpensive and is a quick change! I bought a sample pot of the Behr Marquee paint and had a little leftover when I was finished. For our door I did two coats of paint.
I bought this console table for the wall where our bench used to be. It’s sleek and minimal and fits this room so nicely. I love having a spot to put our keys and some plants. The large mirror is also from Home Depot.
The next big change in here was the area rug. I switched our old jute area rug that was here for this larger round area rug. This is a 5′ x 5′ rug and not really meant for the front door. I say make your own rules 😉 It’s extra cozy now, the colours are great for camouflaging any dirt and it’s really soft underfoot. We don’t track a lot of dirt and mud through here, despite this being our only entrance, but I do have a portable steam cleaner that I can use if we do get any stains on here.
Here’s the before and after!


It’s so much brighter in here! We don’t have a lot of light in the afternoon (the morning sun shines on this side of the house) so despite using a darker colour on the door, the changes we made in here make the whole space feel light and airy.


Of course, there are usually kid’s jackets, winter coats, little boots and mittens all over the place plus my purse and the normal everyday things on the console table. It’s not normally this pristine lol! I shared a mini tour of this space on my IG stories if you wanted to pop over and check that out (jackets and boots are all out for that tour too lol).


I love how it turned out! These changes made our small foyer feel completely different and now it’s 100 x more usable space for us, especially the closet! Thank you for reading and stay safe out there friends ♥

4 Comments
Thank you!
Your entry is really beautiful! I love the bench in the closet too. We are going to install a bench but keep the rod for the coats, so many coats! But storage under the bench will be key and a little sitting space for putting boots on! Thanks for the pics!