
I partnered with Lowes on these adorable closet makeovers. As always, all opinions are mine.
When we moved into our current home, it was about 75% finished and the builder’s wouldn’t even entertain the idea of adding in shelving and additional closet rods to the bedroom closets (I have no idea why! I think it was a time issue?) so the kid’s closets have been on my radar since we’ve moved in and I’ve been itching to give them a makeover.
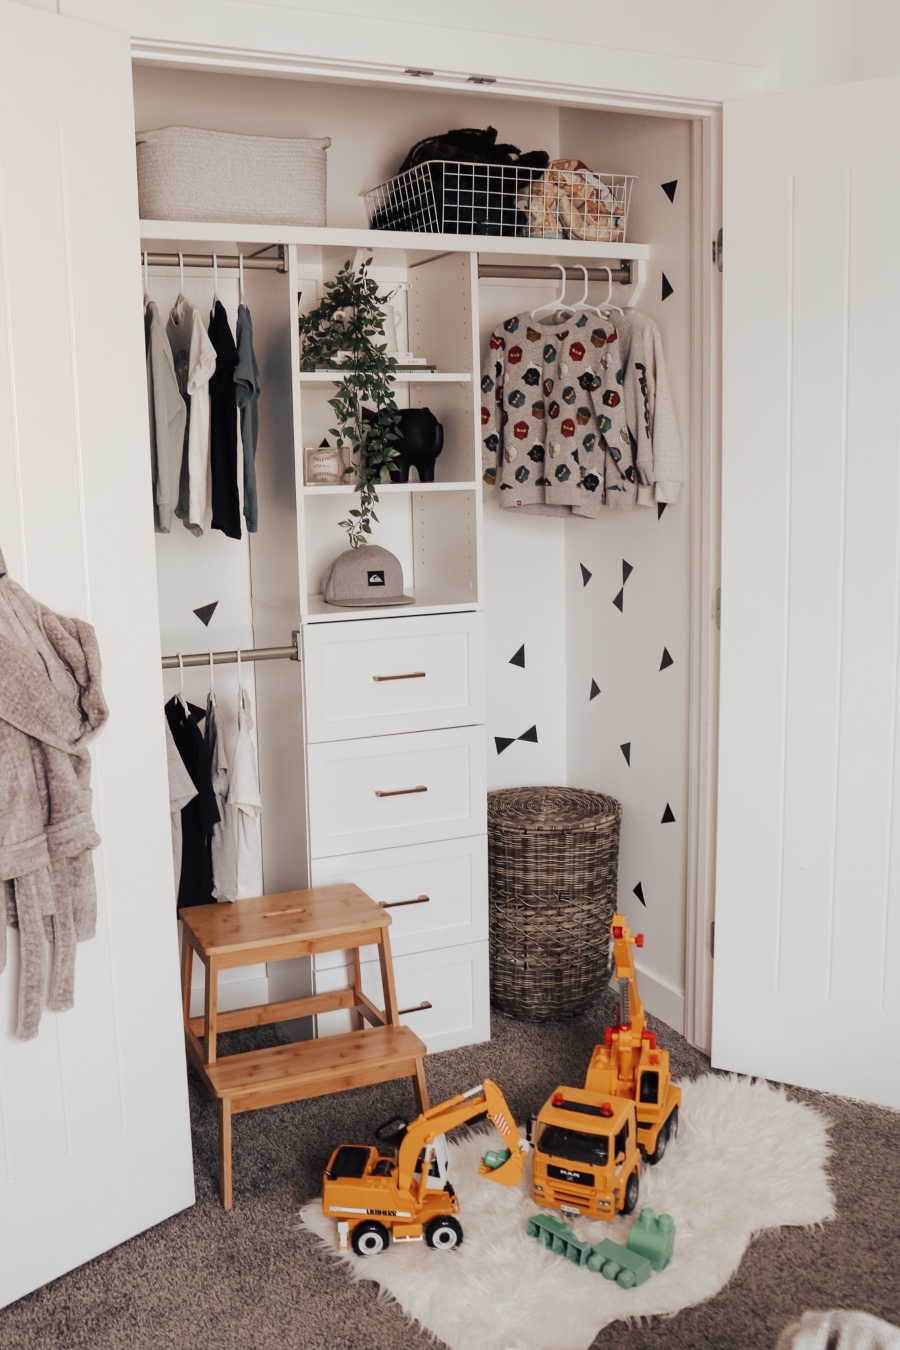
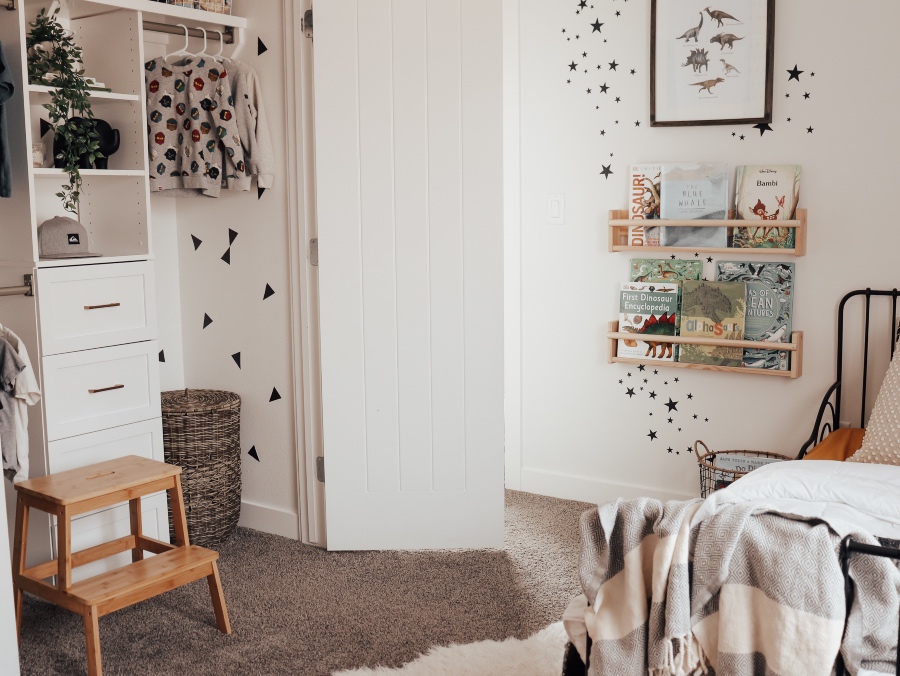
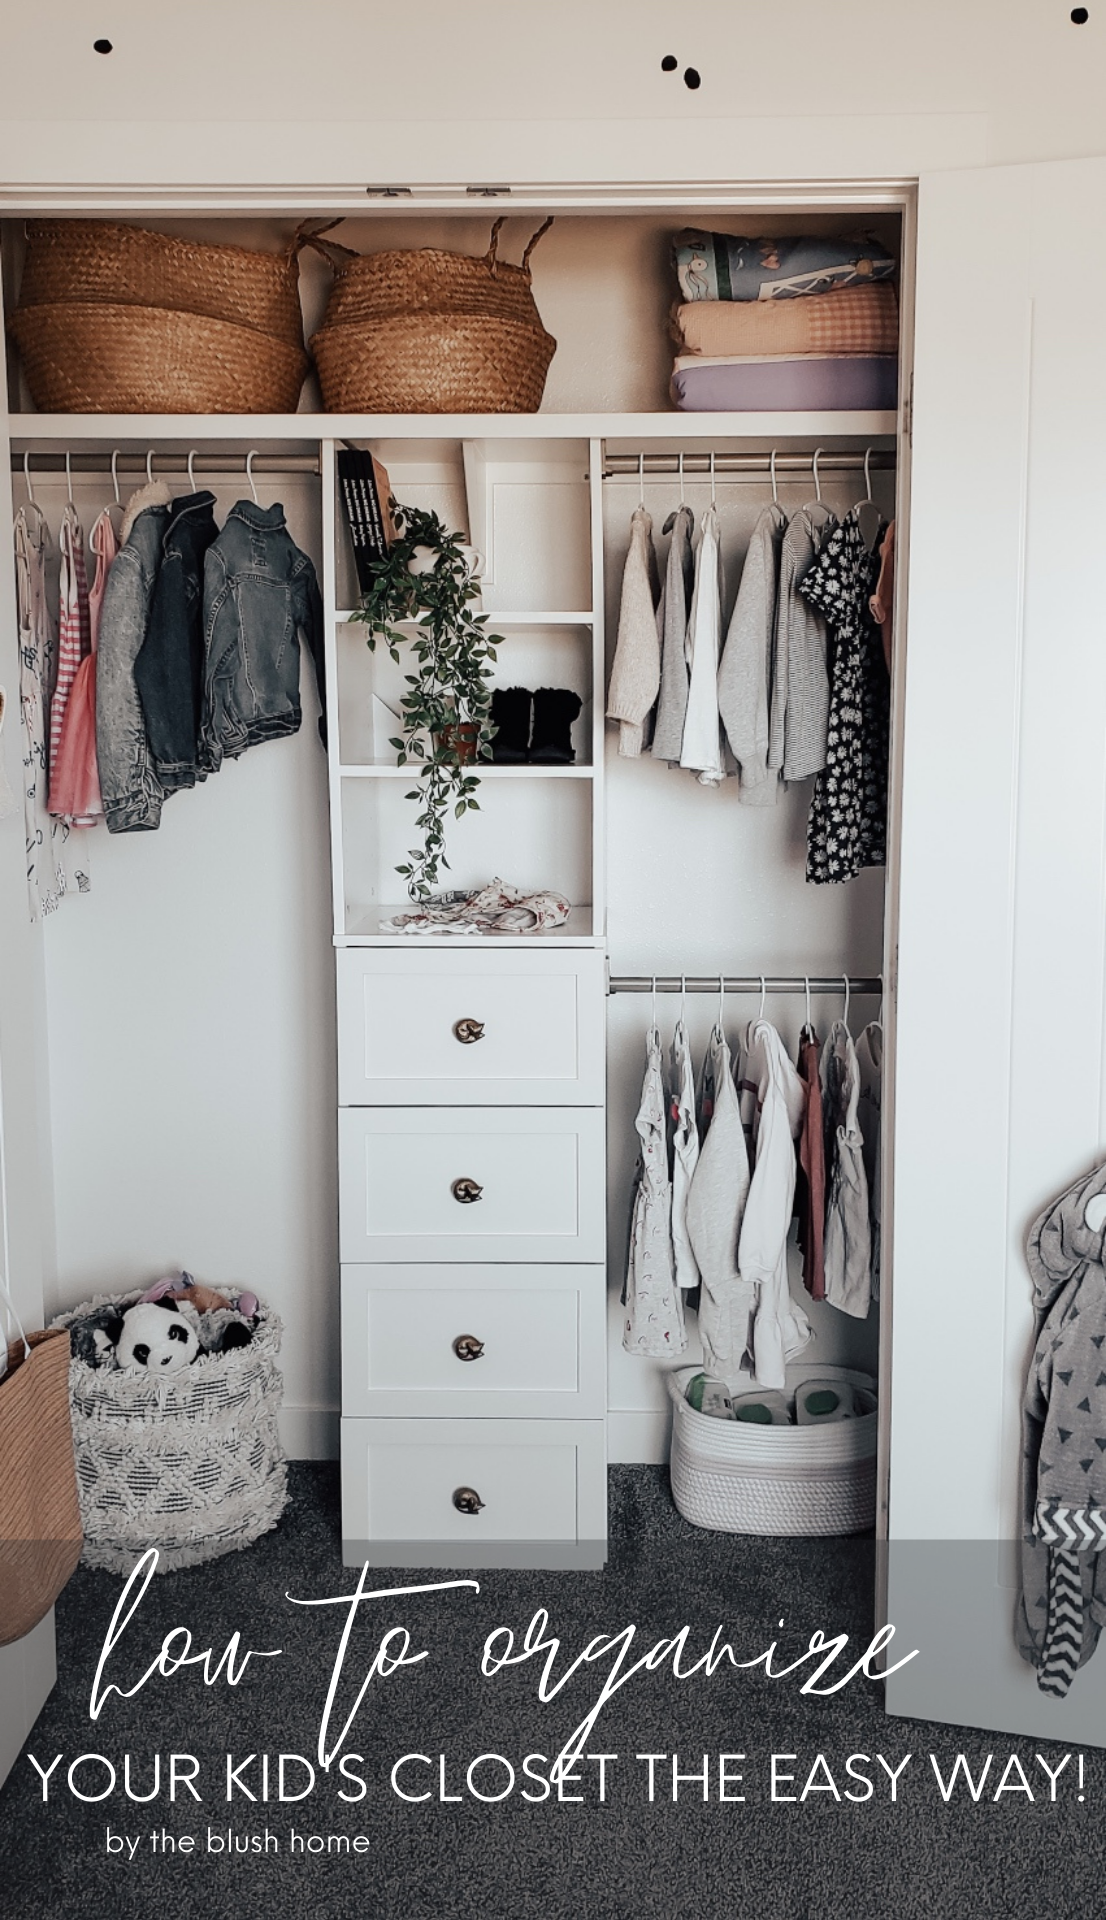
I wanted to add additional shelving and kid-friendly closet rods so that both of my kid’s can get their outfits ready in the morning. Plus their closets are a decent size, so that one shelf and rod weren’t doing the space any favours. I made due by pushing their dressers into the closets (which didn’t look that great tbh lol) and adding bins to organize the top shelf. It worked but it’s a lot of wasted space and since we live in a smaller home, it is one of my pet peeves!
We have zero storage as is,
so every little space helps. I ended up ordering the Closetmaid Suite Symphony through Lowes and spent the day putting it all together with Kiel. The difference in storage and organization makes me so happy! Plus my kid’s are so happy they can get their shirts down in the morning. It’s the little things guys lol!


What exactly did we use in the closets?
I ordered the ClosetMaid Suite Symphony organizer from Lowes, along with 4 of these drawers for each closet and additional shelving to put above the lower closet rod. I knew we would be customizing these since both closets are narrower than the 6′ minimum sizing. It worked like a dream and was really easy to adjust, so don’t let that deter you if you have a really small closet. Since this was made over during Covid-19, I used my house to shop for all the storage and decor pieces (but I would love to get some matching baskets for the top shelf.

How we customized the closets:
We worked on one closet at a time, starting with my daughter’s. First, we emptied out the closet and removed the rod. I decided to utilize the top shelf that was already there instead of removing it and using a Closetmaid shelf.
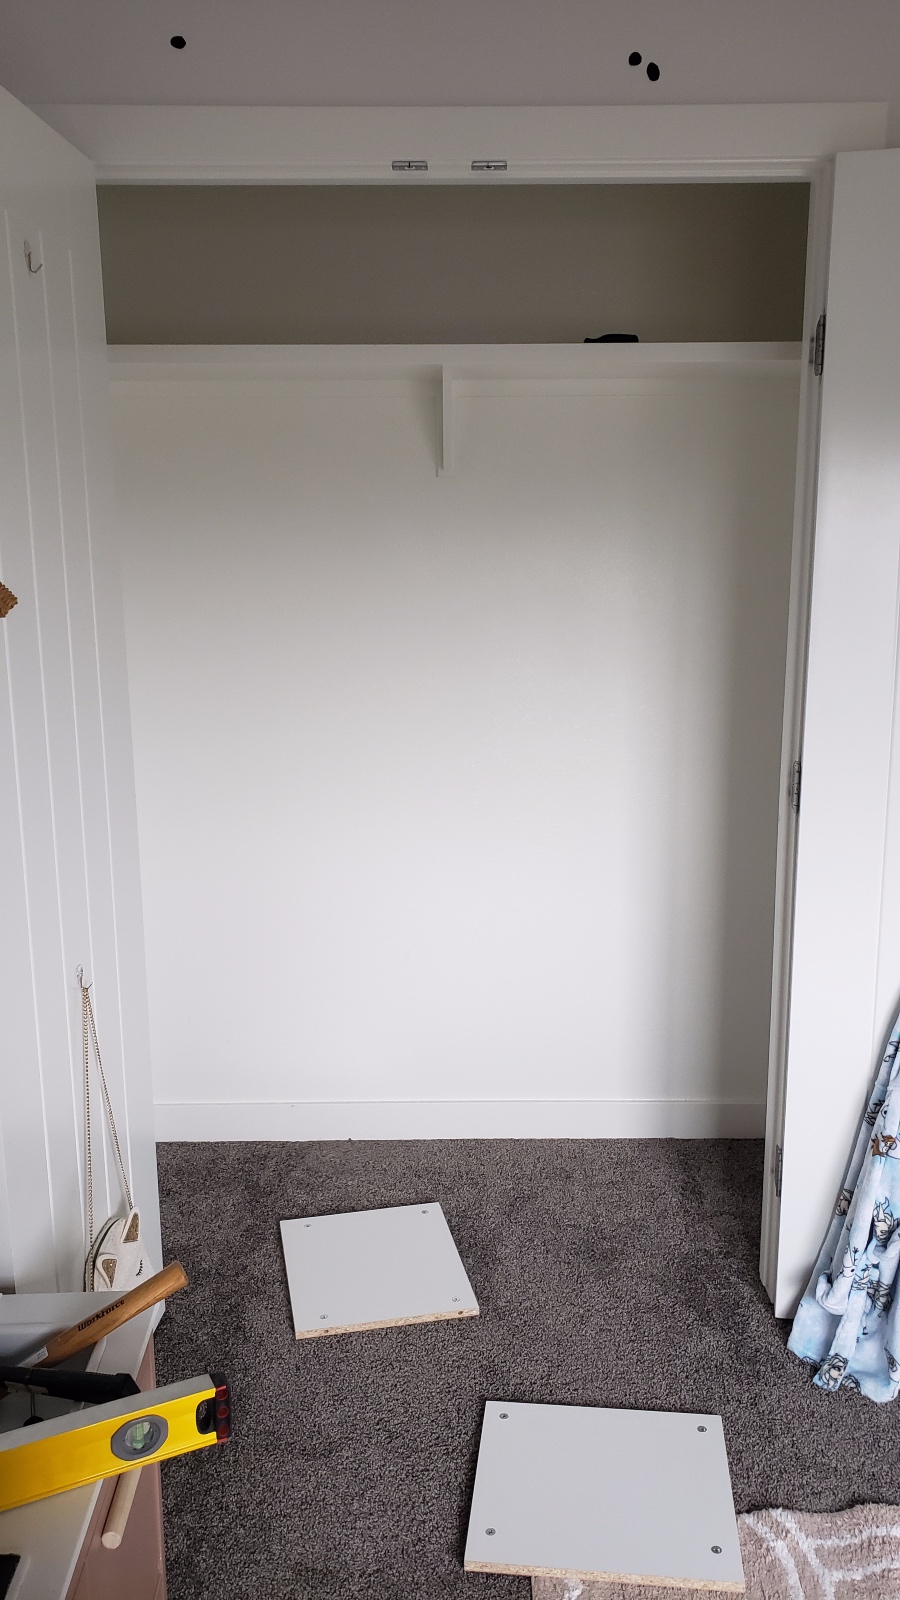
Kiel and I built the closet system starting with the middle tower. It was easy to put together and took no time at all. We did need to customize the middle tower though, so that took a minute to figure out lol. Since we were using the top shelf, we cut about 10″ off the top of the tower to fit underneath our pre-existing shelf. The middle tower was secured to the wall.
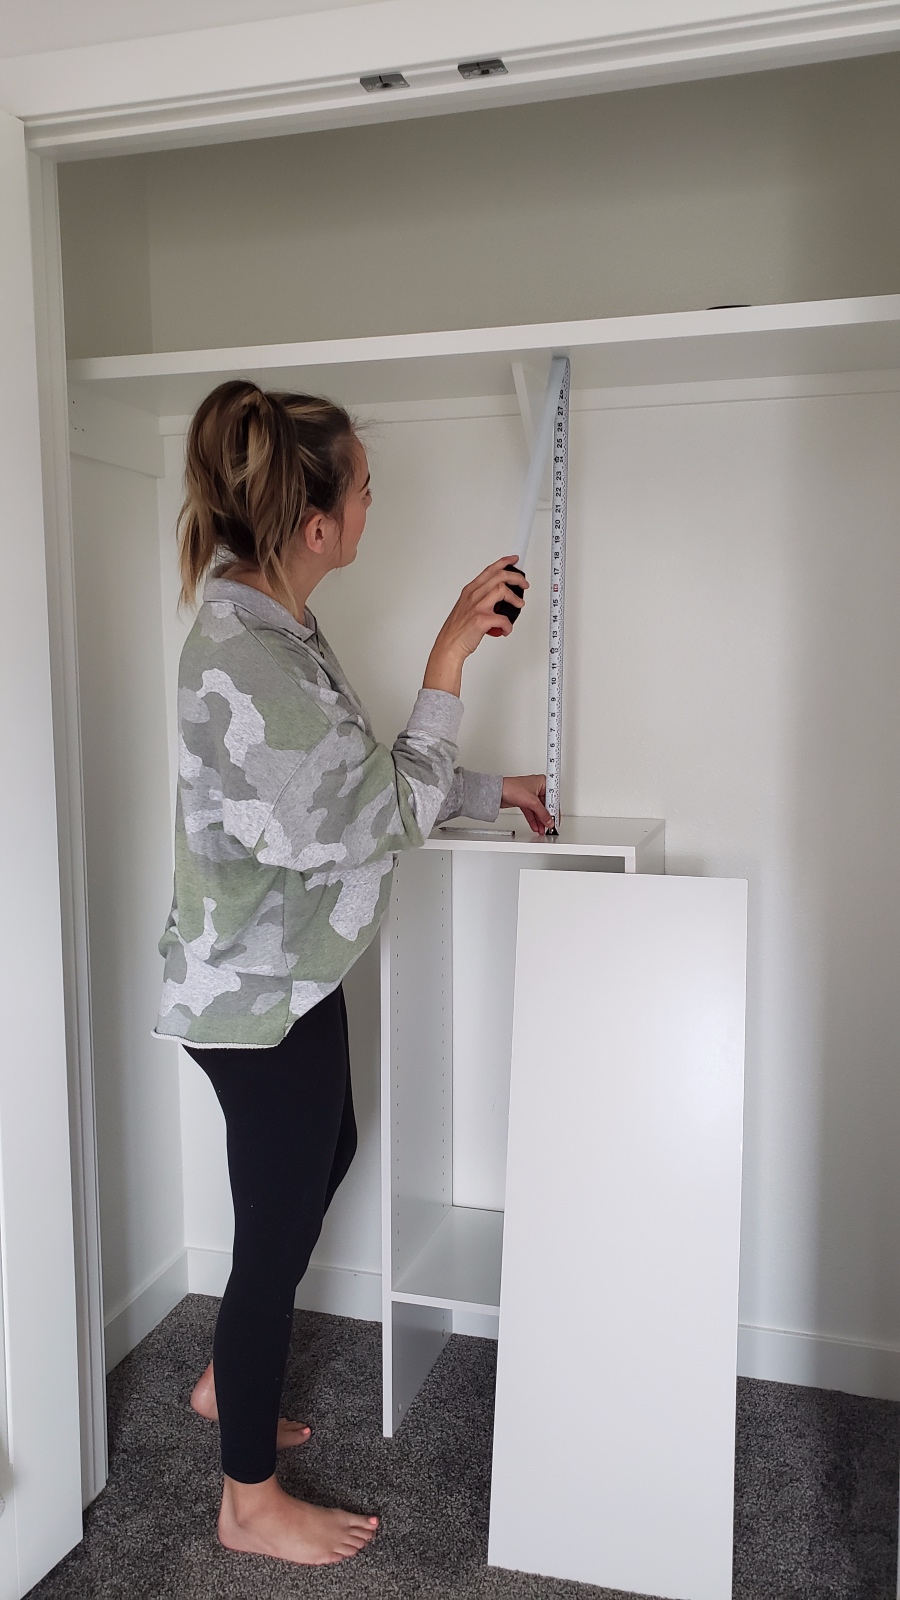
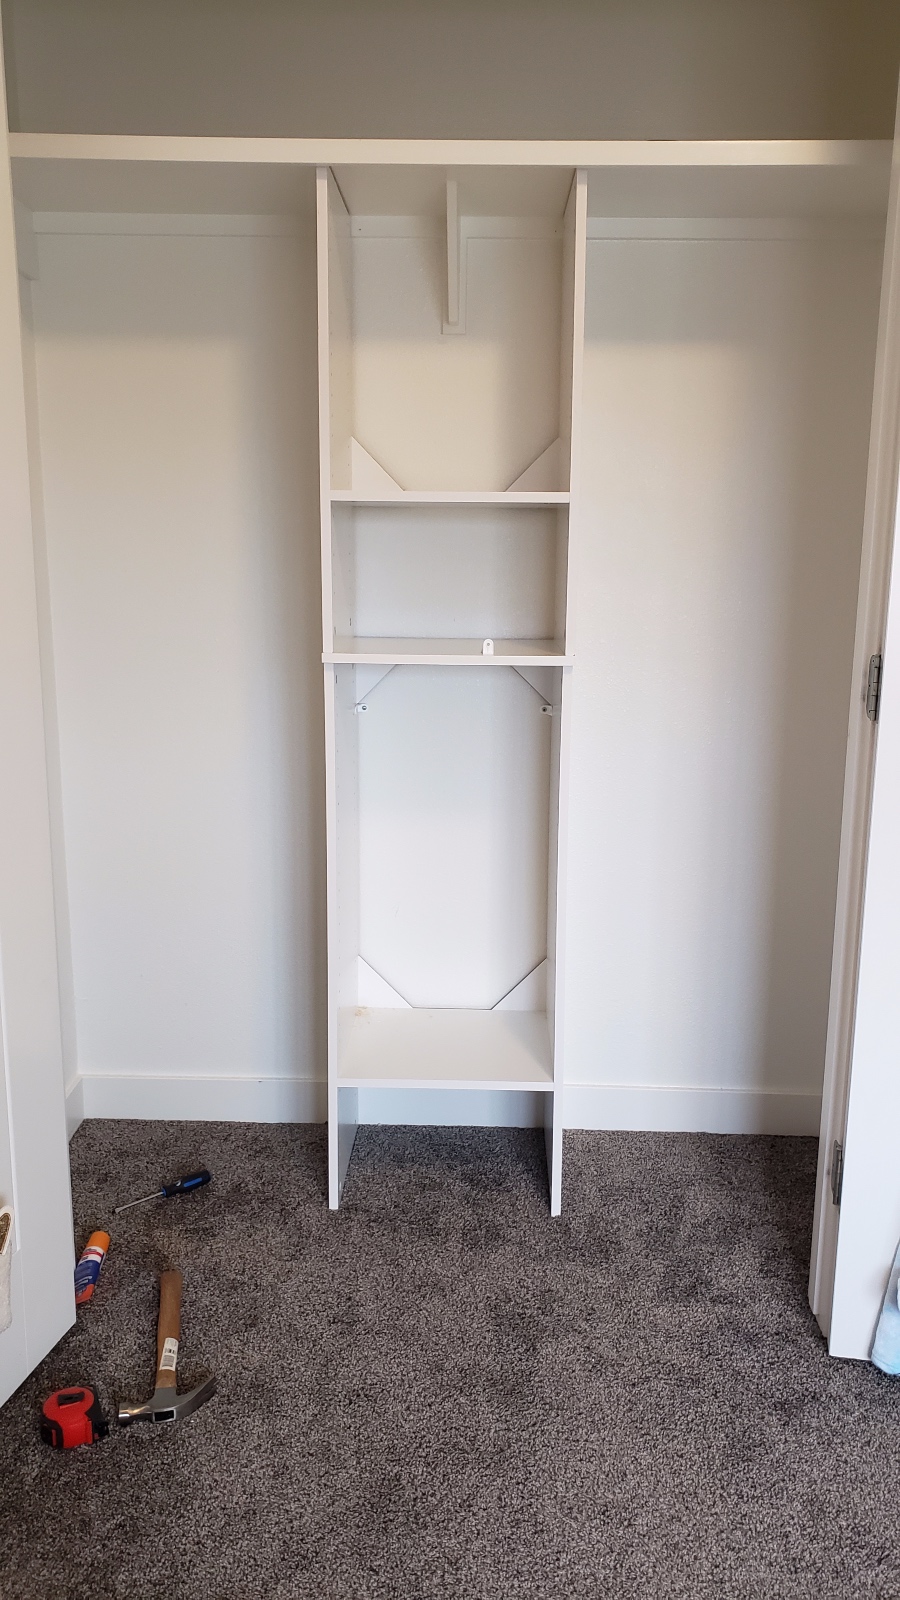
I measured the rods out and used our circle saw to cut them down to size as well. My son’s closet is 50″ wide and this closet system is made for closets ranging from 72″ to 108″. It was a cinch to customize so don’t let that deter you!
After the closet was built, I did go through and caulk the seams (I just love how it makes everything look more professional). I quickly patched the holes where the original closet rod was and built and installed the drawers.

I wanted to personalize it a bit though…
I found some cute decals on Lowes.ca and thought they would add a fun pop to my son’s closet. The walls in here are textured and the decals have held up amazing! I made sure to really seal the edges so they would stick well. I also switched out the original drawer pulls for some gold ones I found.
Since my daughter has a fun Mr. Fox wallpaper in her room, I repurposed these little fox drawer knobs and love how fun they are.

I filled in the pre-drilled holes with some wood filler, drilled new holes in the center for the new pulls then sanded and touched up the wood filler spots. It looks pretty cute! Adds a personalized, fun touch to her closet.
Now before you put everything back together,
go through the clothing and pack away/donate any items that don’t fit or are no longer worn. I did this to both of my kid’s closets when self isolation started back in mid-March and it makes such a huge a difference!
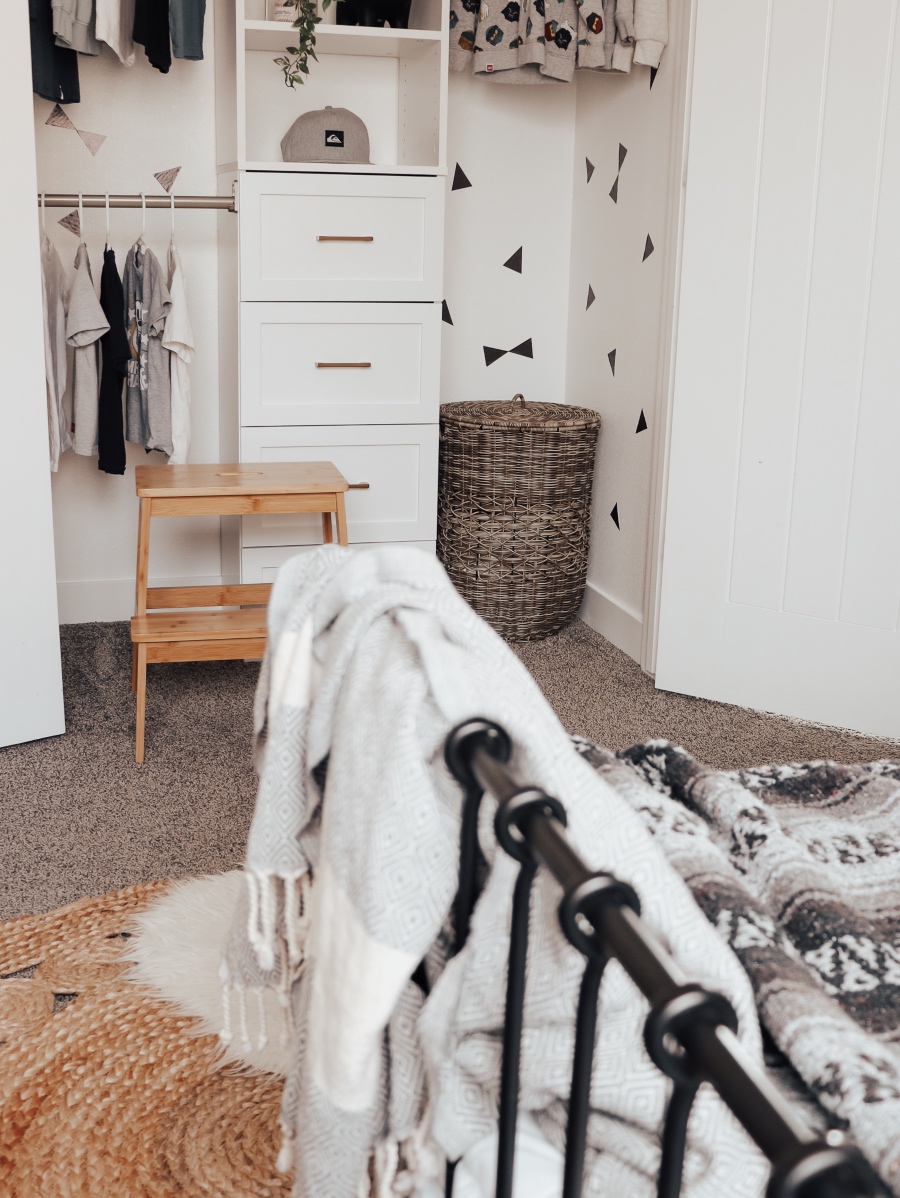
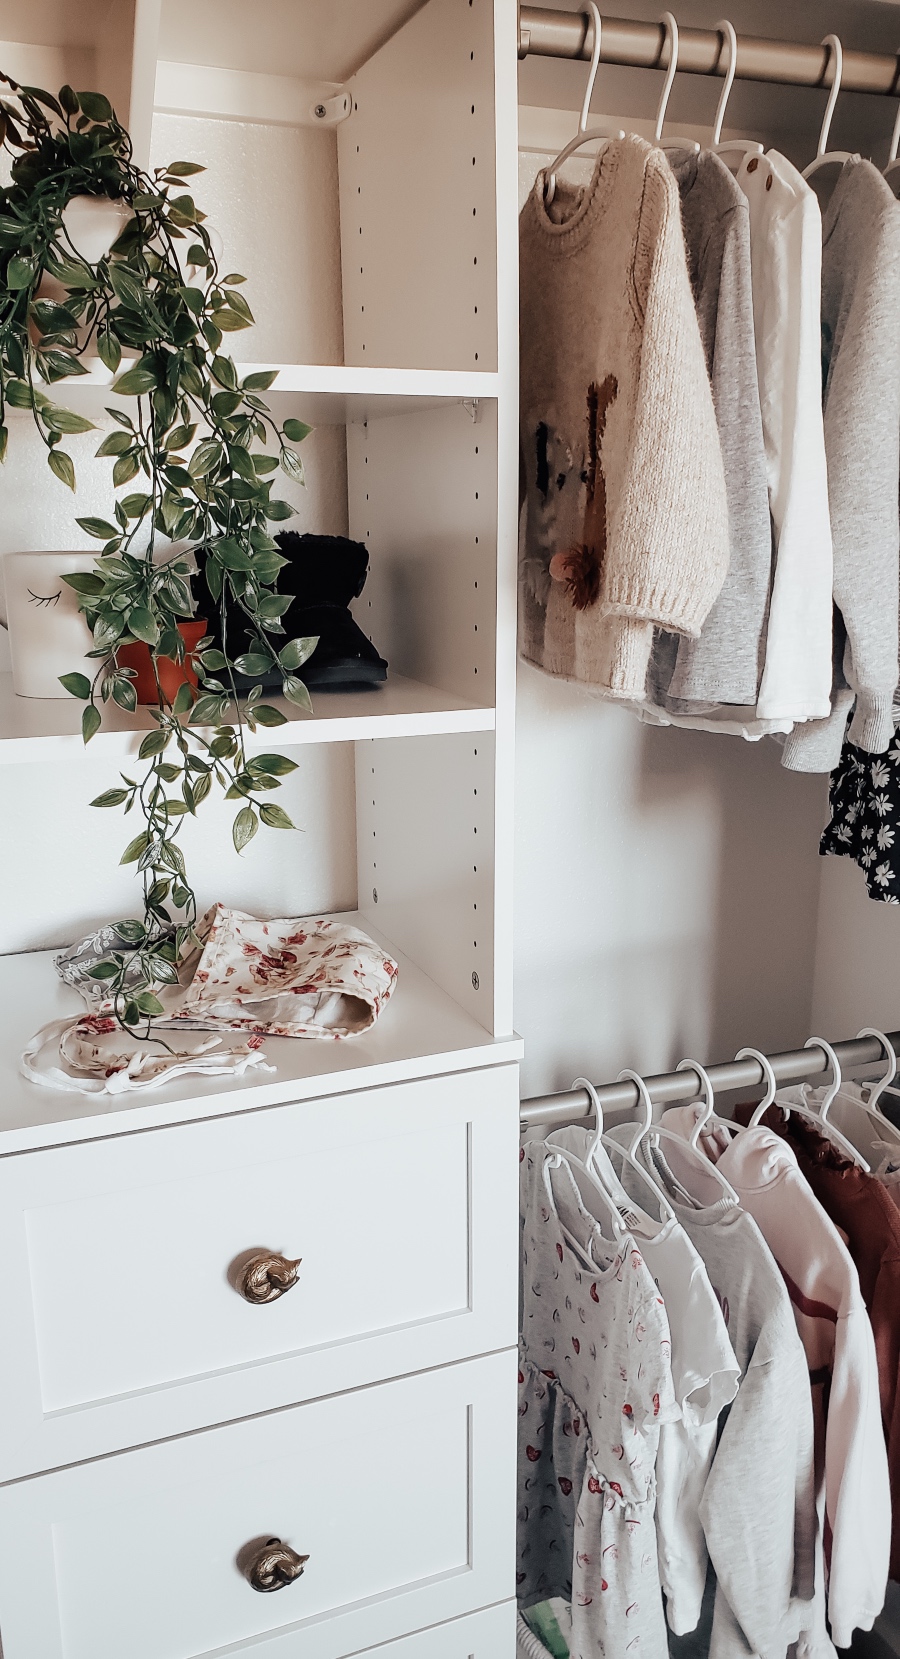
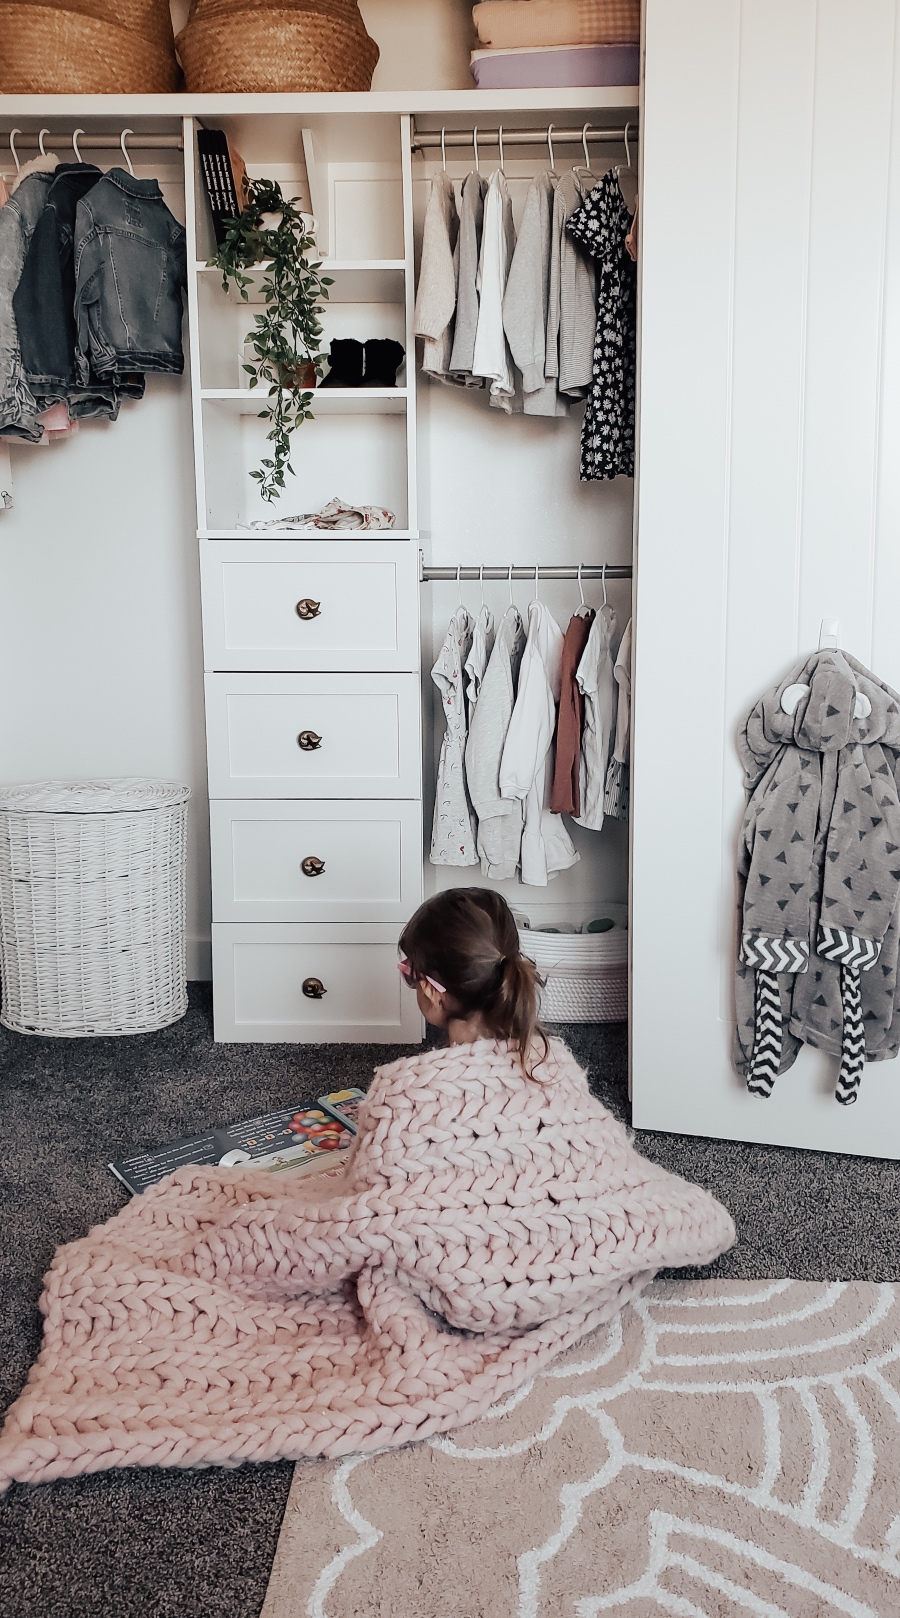
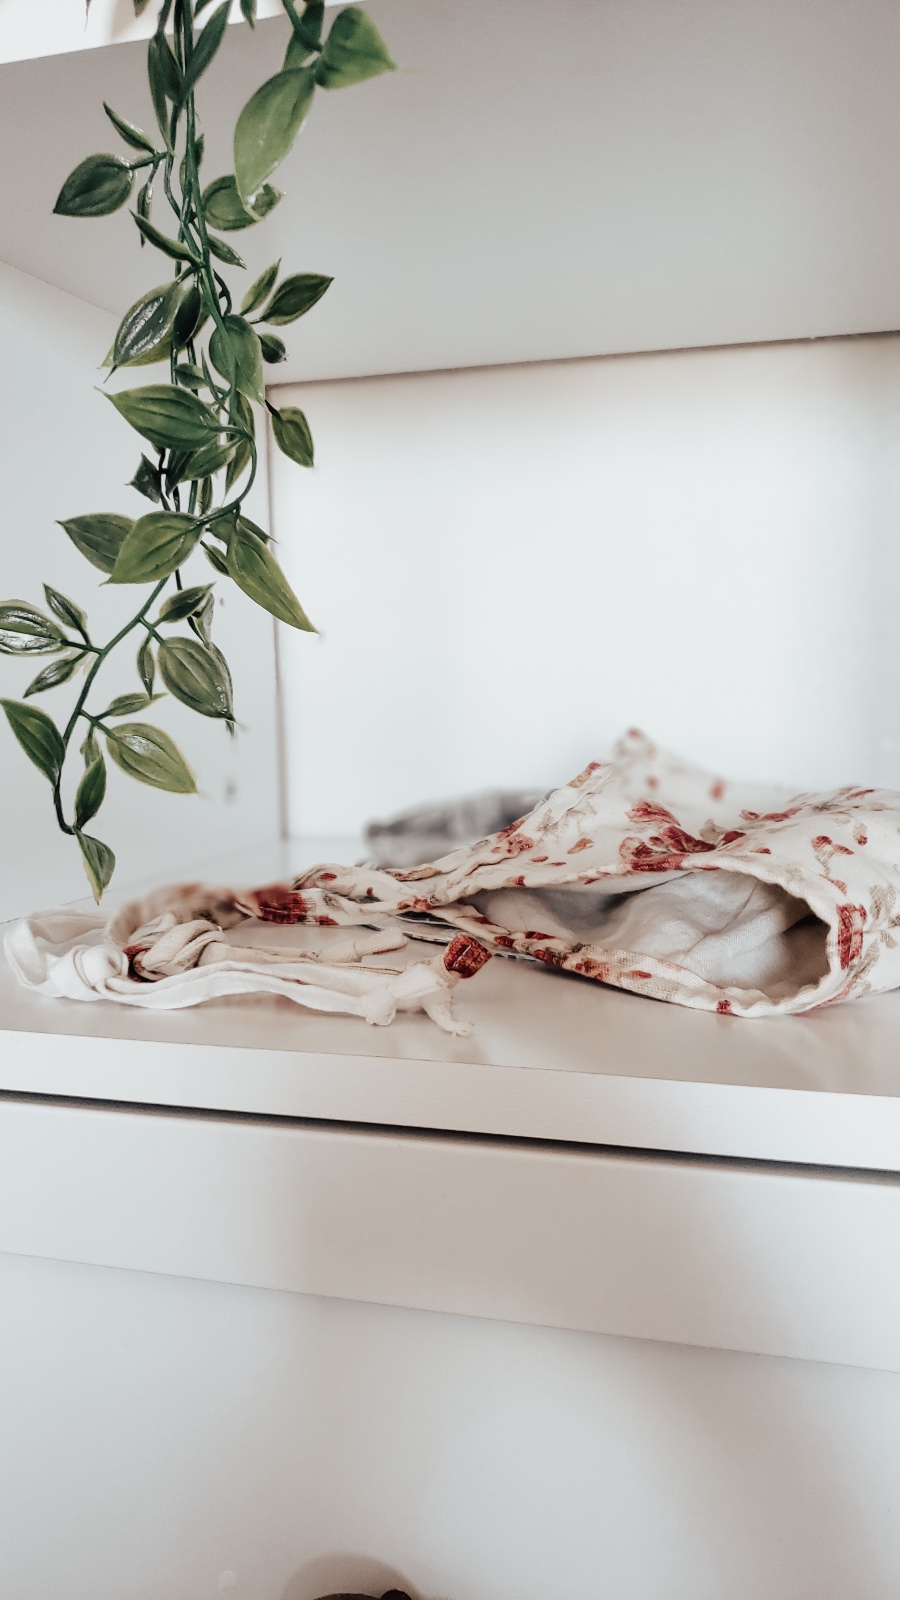
I have extra cozy blankets in a wire basket on the top shelf. Extra out of season clothing or items that are too big that can’t be hung up are organized in a basket and stored up there as well. The drawers double as a dresser now to maximize space so their pants, shorts, socks, pajamas and underwear and stored there and all tops are hung up. Books and larger toys are tucked away in the closet as well.
My son’s room before…

And after!

My daughter’s room before…

And after!
So far the new closet system has been great! The kid’s are picking out their clothing in the mornings (which they’re so excited about) and their rooms just feel more organized and spacious having a tidy closet space and no dressers jammed in there!
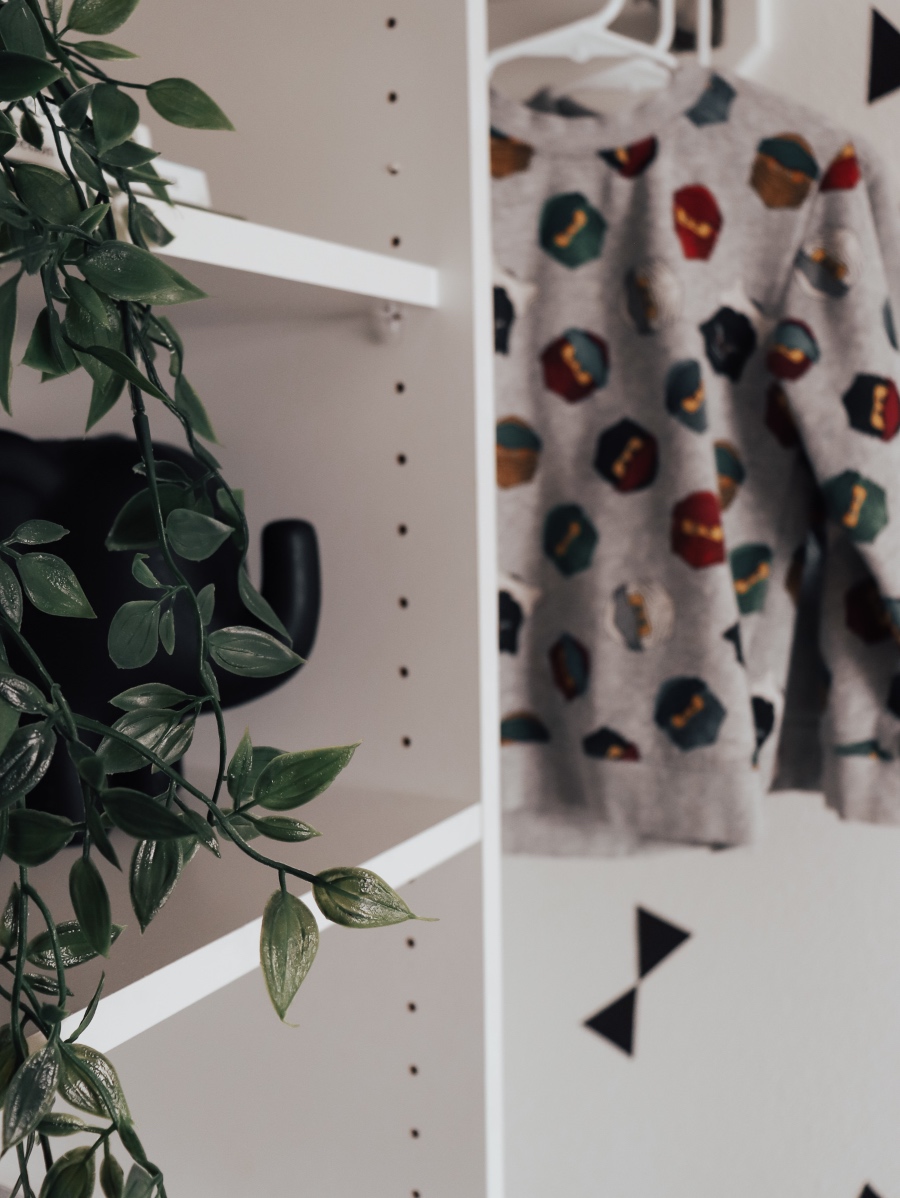
A few more photos of my daughter’s closet…


Here is my son’s closet makeover (those decals are too cute!):
A few things:
- We keep all of the kid’s toys in their rooms. We don’t have a playroom or anything so their rooms hold what they play with (extra toys and toys in rotation are kept in the basement). Everything needs to be organized or else their rooms end up a hot mess! I use bins and baskets to keep the toys sorted for my kiddos.
- I live by the rule that everything should have a home. Bins and baskets are the perfect way to store little odds and ends.
- Smaller toys are kept (somewhat) organized in the storage I have in the kid’s rooms (the wood set in my son’s room are Ikea trofast and the white cubbies in my daughter’s room are also Ikea). Larger toys I’ll store in their closets.
- I like to keep visual clutter to a minimum if I can, especially at bedtime. We clean up their rooms with the kids every night so everything is put away for bedtime.

12 Comments
Hi I wanted to inquire about what shelving system exactly did you purchase. If it’s in the post maybe I missed it. Do you have the name, link, sku number?
Love this! I’ll be imitating this for my daughter’s room. Question- where did you put their shoes?
Looks great! What is the spacing of the double hanging rods from the floor?
Gorgeous! Did you have to fill existing drawer pull holes/paint in order to use fox knobs?
Hi, I found everything online at Home Depot I believe (the knobs were from HomeSense though)
What products did you use with this leinect, I’m looking to make the drawers and Shelves but wondering where to purchase the materials
Hi! Thank you so much 🙂 So we didn’t cut the baseboard or the shelf tower, there’s only a small gap along the back and I wasn’t comfortable messing with it lol. I did use very small L brackets to secure the tower to the wall though. It worked great, and I tucked them in the back so you can’t even tell they’re there.
My daughter has narrow closet too and i have been racking our brain trying to figure out a closet system that works, thanks for sharing! How did you deal with having a baseboard in the closet, did you cut the drawer/shelving tower to fit around it or just put it as flush as you could, and if the latter how do you deal with the slight gap left between the wall and drawers and anchoring it? Thank you!
Hi! Thanks – I adore the fox wallpaper too. It’s from a Canadian brand Rocky mountain wall decals and they’re great. The designs line up really well for the most part and it’s easy to install as well 🙂
Great job! Love the fox wallcovering in daughters room. Can you advise brand-style?