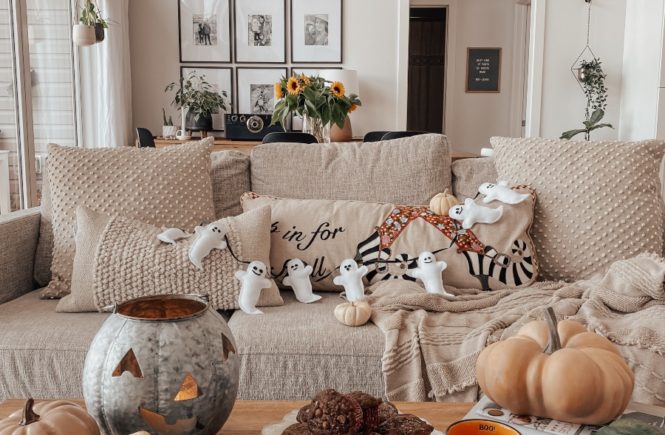
This might be my favourite little DIY to date! This ghost garland turned out so cute! I had a fun little crafting night with some girlfriends and we each whipped up our own little ghost garland, it was super easy to do and I thought I would share with you girl’s in case you wanted to make one yourself! Perfect for getting your home festive for October!

What You Will Need:
- white felt
- black felt
- hot glue
- black ribbon
- pillow stuffing
Step.1
Draw out a ghost template, a little larger than you want the actual ghost to be (when you stuff them they shrink in size a little width wise). Cut out the shapes. I did 8 ghosts in total.
Step.2
Hot glue the ghosts together, leaving a small inch space open so you can stuff them after.
Step. 3
Stuff the ghosts. Glue the opening closed and trim the edges so they’re smooth and trim any little glue strands.
Step.4
Cut out a bunch of tiny little eyes with the black felt. I did a mix of open mouth shapes and little straight lines for the smiles. Hot glue them carefully to the ghosts.
Step.5
Hot glue to the ribbons, spacing them out beforehand. Make sure you leave enough ribbon at the ends for hanging up.


Voila! The cutest little ghost garland!
I hung mine up layered in with this diy ‘Hey Boo’ garland I made with the kids last year. I love it so much, it’s so stinking cute! It would be adorable hung up on a kid’s bookshelf or in their room. It’s so fun and adds a little whimsy to a space. Make sure to tag me if you make one so I can see! I love resharing you girls over on my Instagram! Have a great week, thanks for reading!
x Megan


