

A few months ago I fiiiiinally got around to booking some family photos and they turned out so great! I’m loving my sweet boy’s grumpy face – he was not a fan of photos, felt really shy (he told me later) and even when we could to get him to crack a smile, he was forcing himself to frown because toddlers are the most stubborn people you will ever come across haha. Anyways, grumpy face and all, I adore these pictures – they turned out so great! The only problem is I didn’t have a way to display a bunch all at once without turning our bedroom into a McLeod family shrine. Sooo of course I ended up making a DIY family photo display.

I have seen these at Michael’s for over $30 and they are just a basic, rustic hanging photo frame. I made mine for pennies and if you have an old wooden frame lying around, you can whip this up too!

I first removed all of the staples or anything sticking out around the edges. Then I gave the frame a light white wash (which I didn’t end up liking as is), so once that dried, I went back with some darker brown/grey wood glaze (wood stain would work fine too). The result was a lovely grey rustic finish.
I used my glue gun to add some twine to the back. I searched high and low for my mini clothespins (that I’ve kept for years and years just for this moment) aaand of course they are nowhere to be found *sigh*, I have the most organized unorganized craft room ever hah. So until I find those little clothespins (which will up the cute factor so much!), I used a small dot of hot glue on the back of each photo to attach it to the twine. (Once I find the mini clothespins, I’ll use a little bit of glue on the back of them to attach them to the twine, then hold my pictures with them, so they can be easily changed out.)


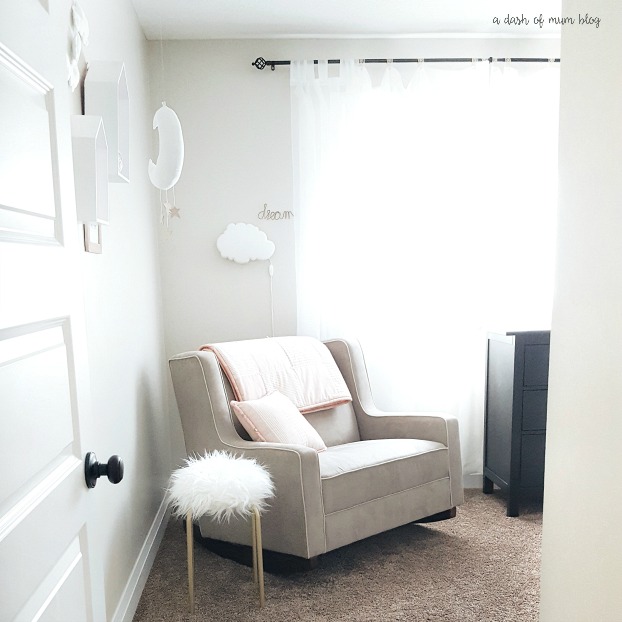
I love how it turned out – adorable, right? This was a perfect upcycled craft with an old frame and it is the perfect way to showcase cute photos. I think in total, my active crafting time was less than 30 minutes and I love that I can switch up these photos throughout the year as well. I haven’t found exactly where I want to hang this yet, but for now I love it in this little corner of our bedroom.

Follow along with me!
instagram | bloglovin | pinterest
You might also like…
How To White Wash Furniture

Linking Up With:
Iris Nacole

2 Comments
It really does make a huge difference, love the dark grey wood 🙂 And thank you so much for reading!
Love the change of colour to the frame, makes all the difference! Hah I’m always so excited to see you post a DIY!