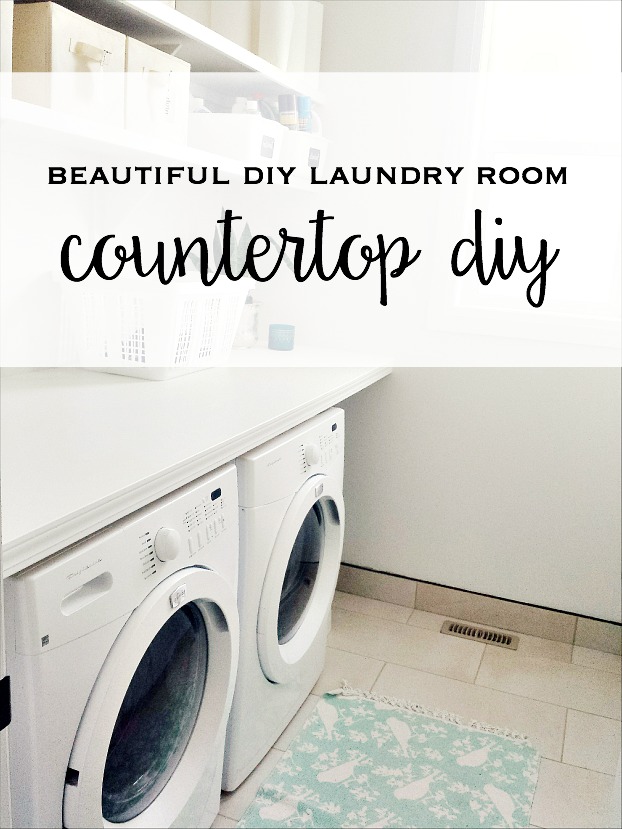
I am in love with our new countertop! Look at how big & beautiful it is…

This was one of the biggest diy’s that I’ve done to date and I’m really proud of it, because she was a beast; 90″ wide, rather heavy, and I had to lug this thing from Home Depot, cram it in my SUV and then drag it into the garage… while 5 months pregnant #becauseImanidiot lol. But I wanted to surprise my husband with a finished laundry room by the time he went on his days off, so I forged ahead.
My dad did help with the actual laundry room part (there’s no way I could have brought the counter into the house myself nor would I have attempted that). This diy was quite inexpensive, and considering how long this counter top was going to be, I’m amazed at how little the costs were and how I was able to keep them down.
What I bought for our counter:
- aspen plywood – cut down to a 90″ x 30″ piece ($32 total because they actually had the wrong price on the shelf, yay me)
- wood screws – 1 1/2″ ($3)
- behr paint – eggshell in ultra pure white 2750 ($35)
- caulking ($1.50)
- decorative trim ($7)
- I also used some wood from my scrap pile and other various screws that I had at home.
Also needed:
- power drill + bits
- stud finder
- level
- finishing nails + hammer
- caulking gun
Total for the countertop: $73
This was honestly, really easy. If I can do this diy, then anyone can. To start, I measured how high I wanted my counter to be, then drilled in the scrap wood around the edges of the walls, making sure to drill into the studs. This will be the ‘shelf’ for the counter to sit on.
(I didn’t take a picture of just the bracing around the edges for some reason, but you can see them here a bit – we were measuring the cut out for our washer hoses in this pic).

Then we hauled in the plywood sheet and made sure everything fit okay, measured out where we wanted to cut for the washer hoses, and hauled it back outside to cut out the hose nook. I also gave the board a really good sanding with our orbital sander.
The plywood sheet was brought back inside and positioned on the bracings, then we drilled it in around the edges, around every 6 inches or so (counter sink those screws so they can be covered later).
 (we used screws along the sides and small nails along the back, which you can see in the pic^)
Originally I was going to use a large metal bracket as a brace in the middle of the counter, since it’s so large. After we had the counter secured to the wall, we noticed how much it sagged in the middle and didn’t think the bracket would give it enough support. I dug around in my wood pile and found a thick piece of lumber to use. My dad measured it to fit underneath the counter and cut it to size. I didn’t bother with sanding, since it wasn’t that rough. We wedged it in the middle and it worked like a charm. The wood was really snug already, and then we secured it with 2 wood screws (again, counter sunk so I could fill them and hide them). The counter top was really sturdy and wasn’t sagging at all, and bonus: you couldn’t see the support wood unless you bent down to look.

Next up was the trim. The trim was already cut to size, so I aligned it with the counter edge, and hammered it in with finishing nails every 5-6 inches.
 Then I gave the counter another once-over with the sander and cleaned it off really well. I used the caulking gun to seal all around the edges (this is one of my favourite parts, I love seeing a piece come together!) I had some rough patches along the counter, so I used wood filler to even everything out, plus I filled in any holes from the screws. Once it was dry, I sanded it down.

I used the same paint as I did on our faux board & batten wall in the laundry room and gave everything three coats and let it all dry.
She looks lovely and I can’t tell you how this brings the room together. I have so much more storage and a HUGE counter for folding clothes. I’m seriously in love.


And because before & after’s are the bees knees, here you go:


Thanks for stopping by!
sharing over at Thrifty Decor Chick + Up To Date Interiors


4 Comments
Yes! I love an inexpensive DIY! Lol
You should! It didn’t take as long as I thought and it has made SUCH a difference in our laundry room.
i LOVE this and i have been wanting to do it for my front loaders for a couple of years now!!!
Love how inexpensive this update was!